
A properly installed patio door seals off drafts and leaks and, in turn, saves energy and money. To ensure an efficient installation that will function smoothly, require almost no maintenance, and amount to significant energy savings, follow these tips from Andersen Doors and Windows’ Patio Door Installation Best Practices webinar.
Step 1: Assess existing conditions 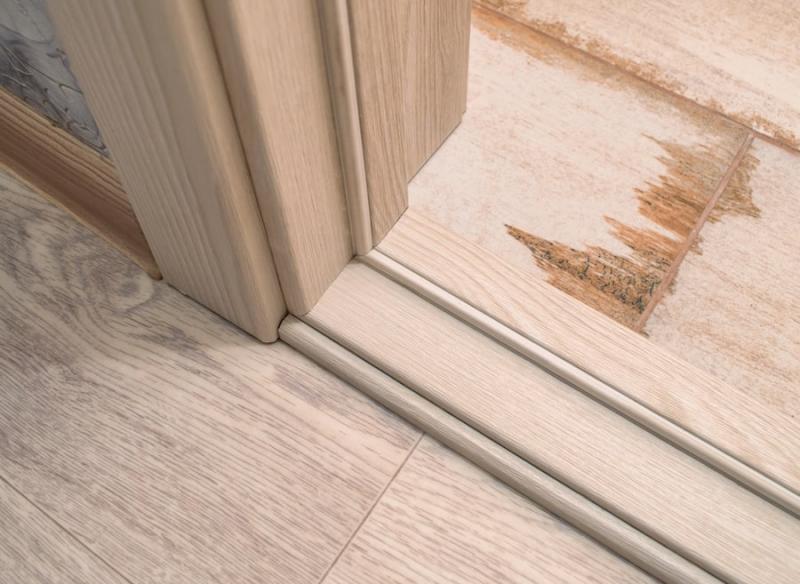
The two most important necessities of a patio door opening are a level sill and a level header strong enough to carry the roof load above it. For a door under 16’ in width, the header should not deflect more than one eighth of an inch, according to industry standards, and for doors wider than 16’, the standard increases to no more than 1/16” of deflection.
Doorways should be free from rot and decay and should be level to ensure that the new door fits securely into the existing space. Common installation issues stem from improper header material, water infiltration, and an inconsistent transition from the doorway to finished floors.
The type of sill selected for the project dictates the transition from doorway to flooring, whether using a raised sill, a flush sill to meet some ADA requirements, or a low profile. Assessing current conditions to ensure stability and determining the type of patio installation suited for the existing space are vital steps to a well executed replacement or installation process.
Step 2: Determine measure points 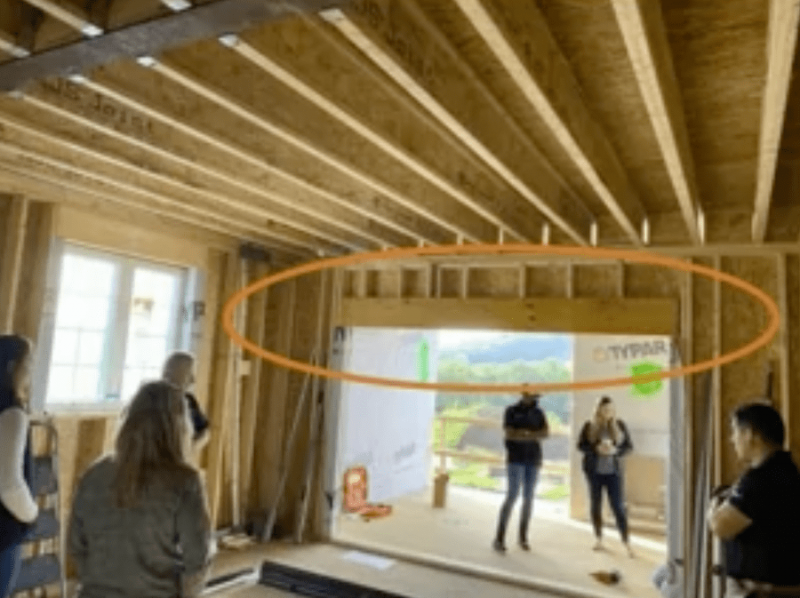
Once the existing doorway is assessed for damage and/or engineered to fit the new sliding door, inswing door, or outswing door, it’s time to measure. Swinging patio doors should be ordered with a specific frame depth based off of the existing wall depth, whereas the sliding door’s anatomy won't change due to wall depth.
Measurements start by recording the width and the height at three points along the vertical and horizontal planes, then recording the smallest of the three to ensure that the product will fit properly into the opening.
Determining the correct measurements for the frame of a patio door may involve tearing off some interior casing to expose the rough opening (RO). To find the rough opening without tearing off interior casing, back out the screws on hinge units and punch in a stiff piece of wire, then mark the depth where the wire hits resistance. This point is the edge of your RO.
READ MORE: How-To Content
Step 3: Flashing the sill 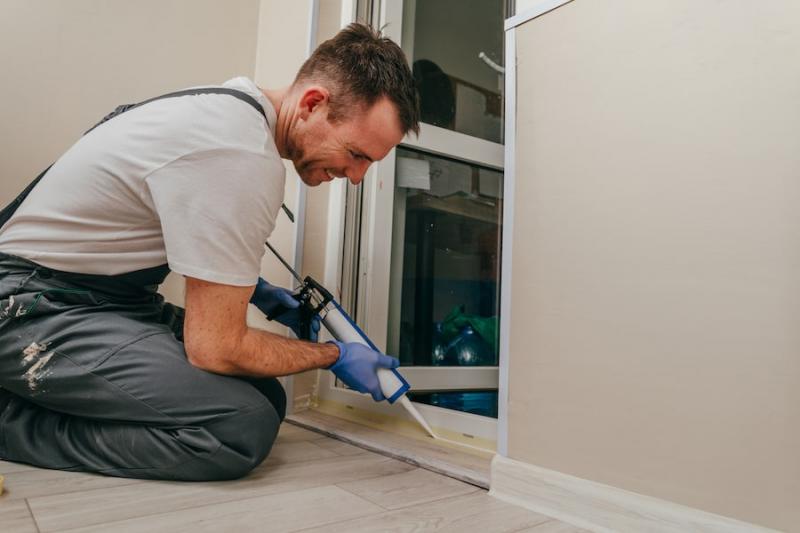
The installation plan starts with the manufacturer's specific installation instructions and materials. Once the rough opening is determined to be structurally sound with proper header material and a solid sill plate is in place, installation can begin. A proper install starts first and foremost with flashing the sill. Use of a j-roller is highly recommended when applying an adhesive flashing to the sill to ensure an even, flat, and consistent application. Proper flashing is the first step to avoid water infiltration, mold, or any other type of avoidable damage.
If you happen to be installing a patio door directly to concrete or directly onto subfloor, a liquid flashing is recommended and can be applied with a paintbrush just as you would apply paint on a canvas or onto a wall. In both methods, the flashing should be applied a minimum of six inches up from the base of the sill onto the sides of the rough opening.
Another step to proper flashing is assuring that all flanges and gaskets are installed onto the frame of the unit before installation. This creates the proper surface to apply flash tape as well as sealants. The last step to properly flashing the sill is to install any manufacturer's recommended or required sill supports to prevent the sill of the unit from hanging away from the sill plate or the sub floor.
Step 4: Shimming 
Shimming is the next step in the installation process to guarantee that the patio door will be installed plumb and square. Typically, doors arrive with pre-drilled screw locations to help installers identify where to place shims to keep the door level and square. It’s absolutely critical to shim behind each screw location. Shims should always be set back three-eighths of an inch to make room for backer rods and sealant.
Flat shims are recommended over wedge shims to ensure that the frame will sit flush and level to the rough opening. Shims act as a structural support by transferring the weight load from the door to the rough opening into the building envelope. Over- or under-shimming can affect the alignment of the patio door and can eventually cause air and water infiltration issues and malfunction of the hardware, which eventually leads to large amounts of repeat service visits.
Step 5: Install per manufacturer instructions 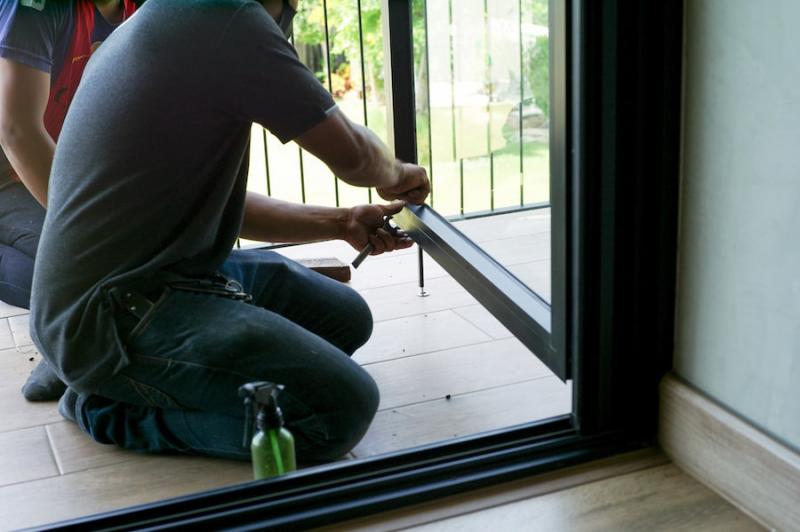
Once shimming is complete, it’s time to fasten the door into the rough opening using proper fasteners to help the door withstand exterior and interior pressures. Every door comes with a fasten chart that should be followed to a T. Before applying the first fasteners in place, center the framing of the rough opening from the exterior, apply downward pressure to seat the door under the beeta sealant, and then clamp the door in place.
The manufacturer's installation instructions may also require gusset plates or sill plates that need to be attached into the rough opening and then attached to the patio door itself. These must be properly installed as instructed or the unit will not perform to its advertised and printed standards.
When fastening the head of the patio door unit, do not nail into installation flanges as a means of securing the unit into the opening. A patio door needs to be fastened to the rough opening by screwing through all pre-drilled holes in the head inside jams. This is what anchors that patio door into the opening, so failure to follow this process could result in the unit falling out of the opening. Shortcuts or missteps taken in the installation process can result in failure of the unit and can cause property damage under certain circumstances.
For doors with flange gaskets installed, liberal amounts of sealant must be applied between the flanges, at the corner overlap, and also at the point where the flange meets the frame. When installing a patio door, a backer rod and sealant option is recommended to keep out exterior elements. When installing using this method, it’s important to first insert the backer rod into the rough opening gap. The backer rod is a closed cell foam material that prevents the flow of water through the joint. It also controls the depth of sealant joint, assuring two points of adhesion between the frame and the rough opening.
Step 6: Apply finishes and verify correct operation 
The last step of a patio door installation is to properly transition the patio door sill to the finished floor on the interior. Many options are available directly from the manufacturer to provide a smooth, clean transition depending on the homeowner’s needs and preferences. A homeowner who prefers a short transition between the patio door sill and finished floor will benefit from a smooth threshold extender, whereas someone who requires ADA accessibility might opt for an extended threshold or ramp options
Now that the door is installed, the last step in the process is to verify operation. Unlock the door and check to ensure that the sliding door panel moves back and forth freely without obstructions. It should easily glide back and forth with just the pressure of a couple of fingers.
Does the door lock and unlock easily? Are the rollers on the bottom of the panel sliding smoothly? Lastly, does the weather interlock engage the full length weather interlock strip that runs along the edge of the operating panel and the stationary panel that creates a scissor lock to keep the outdoor elements out and the indoor elements in?
Once final adjustments are made and the door is functioning properly, the installation process is complete.


Add new comment