With summer just around the corner, deck and patio season is almost upon us. Sean Collinsgru, founder of Premier Outdoor Living, walks through how his team built a custom bar with a privacy wall to create an outdoor entertainment area.
Collinsgru constructed the bar and privacy wall with both speed and quality in mind. One of his time-saving techniques is to create design details that are beautiful and also cover up an inconsistencies produced while cutting.
[ Related: WATCH HARDCORE RENOS BUILD A DECK ON METAL PIERS ]
“We are going to have a three-and-a-half inch piece of trim that covers this seam, so these don't have to be perfect,” Collinsgru says. “I like to do that whenever possible because it just makes the installation a lot faster, and it's a nice detail that looks a little bit better, plus it's easier. That's what I call a win-win.”
Another tip the designer and builder gives is to cut all the same-sized materials at once. He says that a builder can then maintain a good rhythm.
Watch the video to learn more.
[Related: 9 CLEVER SYSTEMS FOR INSTALLING DECKS WITH A HIDDEN-FASTENER LOOK]
Transcript: “Building a Custom Bar And Privacy Wall On a Deck - PART 2”
What's going on everybody? Welcome back to the vlog! I hope you liked that last one with this deck inlay. If you didn't, I don't know what to tell you. You're gonna be hard to impress, I think. This barn privacy wall might be a little bit core, but you probably still won't be happy. So I don't know what to tell you. Please sit, please sit, subscribe for drawing moves. Today we're gonna work on getting this privacy wall figured out. Figuring out this bar a lot of crazy trim details on this I'm going to walk you through the thinking and planning behind it, and also the execution so stay tuned.
[Related: OUTER LIMITS: 27 EXTERIOR PRODUCTS TO IMPROVE YOUR CURB APPEAL ]
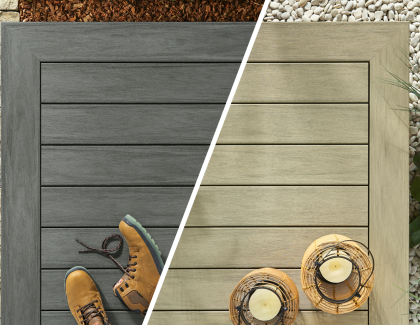
So I'm gonna start on this privacy wall here, and you can see we actually ran out of black stain, so we're gonna use flashing tape over these. There's only a 3/16 gap between each board so it's not gonna be a big deal, but we still like to get these black so that everything behind it just totally fades away and all you see are those boards. We have horizontal tundra boards going in here right up to this halfway point, 28 and a half inches on both sides. And then this whole center portion behind the TV is going to be herringbone so over these seams. We are going to have a three and a half inch piece of trim that covers this seam, so these don't have to be perfect. I like to do that whenever possible because it just makes the installation a lot faster, and it's a nice detail that looks a little bit better plus it's easier. That's what I call a win-win. So we are gonna have 13 horizontal five and a half inch tundra boards going on both sides of the wall. This way plus front and back so I have to cut 52 pieces at 28 and a half and then we can install those we have a bunch of scraps here to start with so I'm gonna start with those
[ Related: 2020 HOME EXTERIORS GUIDE: 21 PRODUCTS OFFERING DURABILITY, AESTHETICS ]
52 pieces, 20 minutes
Bing bang boom, just like that we have all 52 of these pieces cut, probably talking about 20 minutes. so whenever possible if you have a lot of the same cuts just set up get them all cut at the same time while you're in a rhythm, and then you have them sitting here. So what I've done, because we are going to have on this side, it's gonna be flush up against this post. We're not gonna have any trim covering it. You can see on these cut boards I made my mark put a huge tail on that line, so that this has been a cut that was on the miter saw. So it's nice and clean with that perfect leads to a nice beautiful edge. So beautiful!
See the entire transcript here.
[Related: WATCH THE SAMURAI CARPENTER RENOVATE HIS HOME INTO AN OUTDOOR RETREAT ]


Add new comment